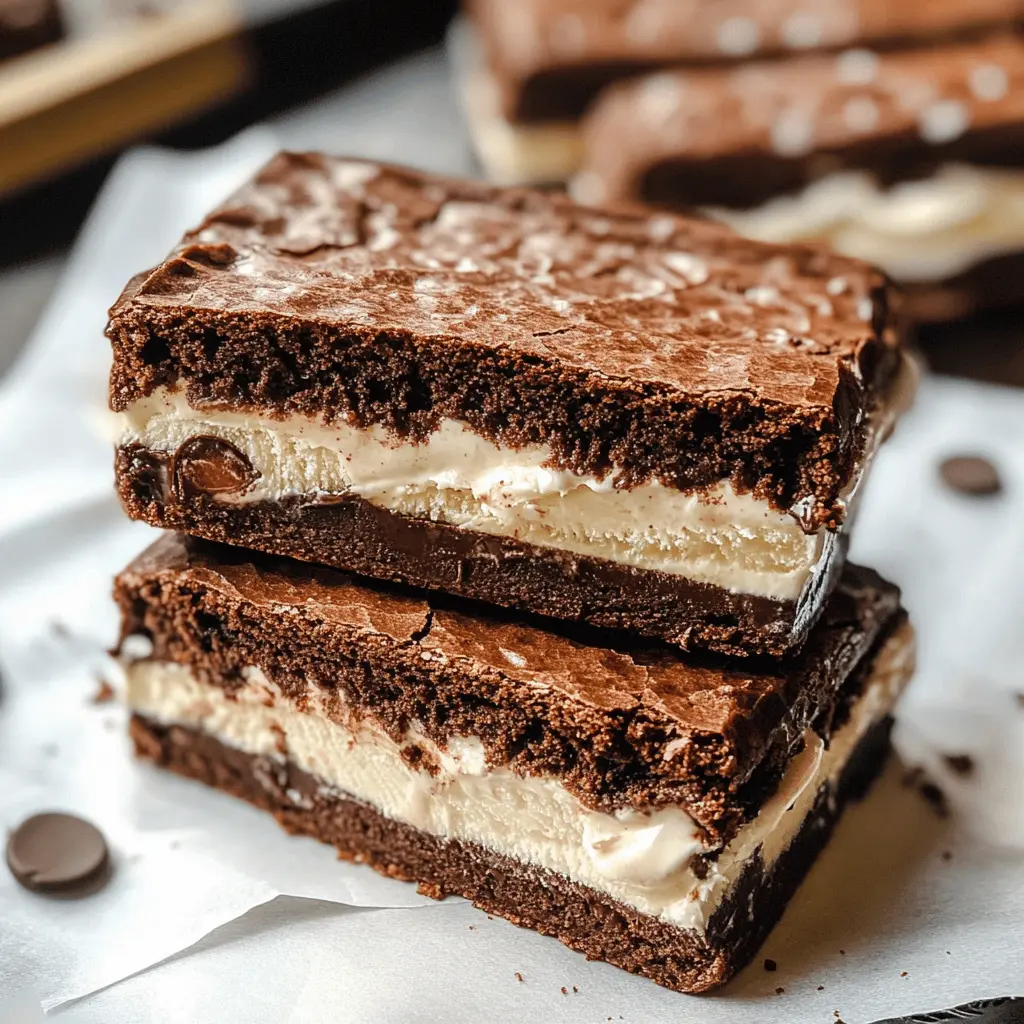
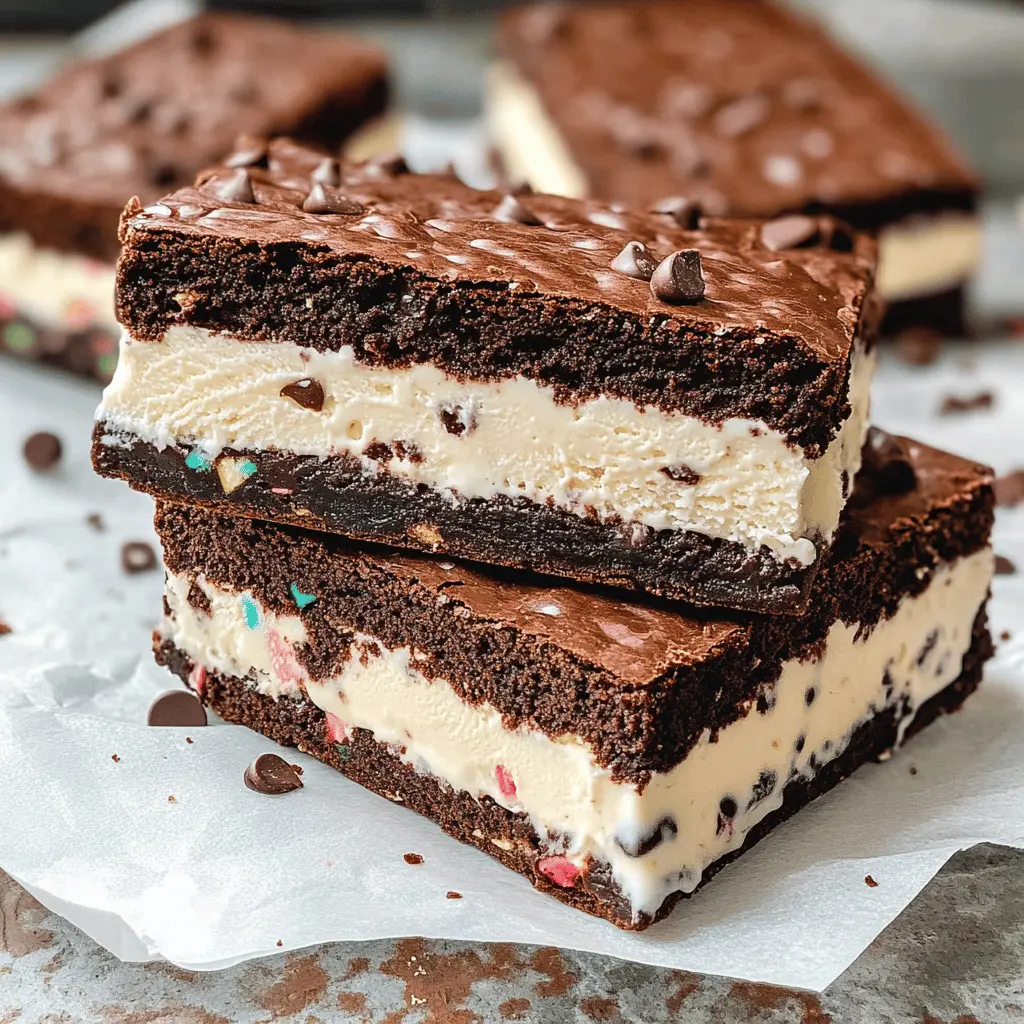
These Brownie Ice Cream Sandwiches are a match made in dessert heaven! Soft, chewy brownies filled with your favorite ice cream make for a sweet treat everyone loves.
Making them is super fun! Just bake the brownies, scoop in the ice cream, and sandwich them together. Trust me, your friends will be asking for seconds (or thirds)! 🍦
Key Ingredients & Substitutions
Unsalted Butter: This creates a rich flavor in brownies. If you’re out, you can use salted butter but cut back on additional salt to avoid overpowering the sweetness.
Granulated Sugar: Essential for sweetness and moisture! For a different taste, consider using brown sugar for a bit of caramel flavor.
Cocoa Powder: Unsweetened cocoa powder is important for that deep chocolate taste. If you’re out, you can use special dark cocoa or Dutch-process cocoa if you have it on hand, but keep in mind it may alter the flavor slightly.
Chocolate Chips: These are optional but really enhance the texture. If you prefer a non-chocolate option, try white chocolate or even nuts for a crunch.
Ice Cream: I love using classic vanilla, but feel free to switch it up! Mint chocolate chip or cookie dough gives a fun twist. You can also use dairy-free ice cream for a vegan version.
How Can I Ensure My Brownies are Perfectly Moist?
The key to moist brownies lies in not over-baking them! To nail this step, here are some tips:
- Keep an eye on the timer; check them at the 20-minute mark.
- Use a toothpick; it should come out with a few moist crumbs, but not wet batter.
- Allow them to cool completely in the pan, which keeps them tender.
Also, for an extra kick of chocolate, don’t skip adding chocolate chips into the batter!
How to Make Brownie Ice Cream Sandwiches
Ingredients You’ll Need:
For the Brownies:
- 1 cup unsalted butter (2 sticks)
- 2 cups granulated sugar
- 4 large eggs
- 1 teaspoon vanilla extract
- 1 cup all-purpose flour
- 1 cup unsweetened cocoa powder
- 1/2 teaspoon salt
- 1/2 teaspoon baking powder
- 1 cup chocolate chips (optional, for added texture)
For the Ice Cream Filling:
- 2 pints of your favorite ice cream (vanilla or chocolate recommended)
For Garnish (optional):
- Mini chocolate chips or sprinkles
How Much Time Will You Need?
This recipe will take about 10 minutes to prepare the brownie batter, 20-25 minutes to bake, and then 3-4 hours to freeze the sandwiches. So expect about 4-5 hours total, mostly waiting for the brownies to cool and the sandwiches to freeze!
Step-by-Step Instructions:
1. Prepare the Brownies:
First, let’s get those brownies ready! Preheat your oven to 350°F (175°C). Grease and line a 9×13 inch baking pan with parchment paper, leaving some overhang. This will make it easy to lift out the brownies later.
Now, in a large saucepan, melt your butter over medium heat. Once it’s melted, take it off the heat and mix in the sugar, eggs, and vanilla until it’s all combined. In another bowl, sift together the flour, cocoa powder, salt, and baking powder. Gradually add this dry mixture to your wet ingredients, giving it a good mix until just combined. If you want to add chocolate chips for extra yummy texture, fold them in now.
Pour your brownie batter into the prepared pan and spread it evenly. Bake for 20-25 minutes, or until a toothpick stuck in the center comes out with just a few moist crumbs. Now, let your brownies cool completely in the pan.
2. Prepare the Ice Cream Filling:
While the brownies cool, it’s time to soften the ice cream. Let it sit at room temperature for about 10-15 minutes. This will make it much easier to spread on the brownies!
3. Assemble the Sandwiches:
Once your brownies have cooled, lift them out of the pan using the parchment paper and place them on a cutting board. Cut the brownies in half lengthwise to make two long strips.
Now, take one half and spread a nice, even layer of softened ice cream over it. Then, place the other brownie half on top to create a sweet sandwich. Press down gently to make sure everything sticks together nicely. Repeat this with the other brownie halves and the rest of the ice cream.
4. Freeze the Sandwiches:
Wrap each sandwich individually in plastic wrap or parchment paper. Place them in the freezer for at least 3-4 hours, so the ice cream can set well. Trust me, the wait is worth it!
5. Serve:
Once frozen, take the sandwiches out of the freezer. If you’d like a fun touch, you can roll the edges in mini chocolate chips or sprinkles. Now slice them into squares and enjoy your delicious Brownie Ice Cream Sandwiches!
Enjoy your treat! They’re perfect for sharing or a special dessert.
Can I Use Boxed Brownie Mix Instead of Homemade Brownies?
Absolutely! If you prefer a quicker option, you can use a boxed brownie mix. Just follow the package instructions for baking, then cool before assembling with ice cream. This can save time without sacrificing too much flavor!
What Ice Cream Flavors Work Best?
While vanilla and chocolate are classic choices, feel free to get creative! Mint chocolate chip, cookie dough, or even coffee ice cream can add a fun twist to your sandwiches. Just make sure the ice cream is soft enough to spread easily!
How Should I Store Leftover Sandwiches?
Store any leftover brownie ice cream sandwiches in an airtight container or wrap them individually in plastic wrap. They will keep well in the freezer for up to two weeks. Just let them sit out for a couple of minutes before enjoying for the best texture!
Can I Make These Gluten-Free?
Yes! To make gluten-free brownie ice cream sandwiches, substitute the all-purpose flour with a gluten-free flour blend. Ensure all other ingredients (like chocolate chips and ice cream) are also gluten-free. Enjoy your gluten-free treat!