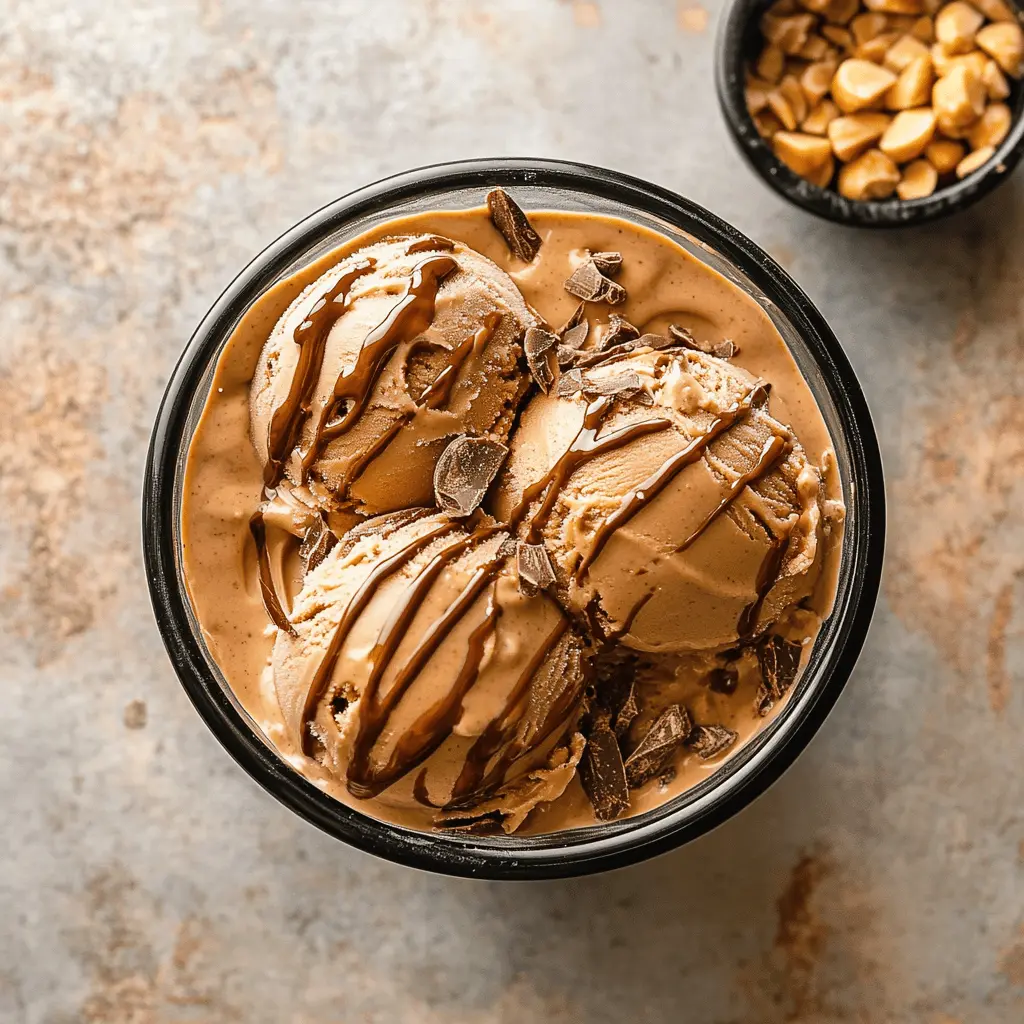
This Easy Homemade Chocolate Peanut Butter Ice Cream is a sweet treat that’s super simple to make! With creamy peanut butter and rich chocolate, it’s a perfect mix of flavors.
You won’t believe how easy it is to whip this up in a Ninja Creami. Just blend, freeze, and scoop away! It’s my go-to dessert for hot days. Enjoying this feels like a little celebration! 🍦
Key Ingredients & Substitutions
Whole Milk: This gives the ice cream a creamy texture. If you want a lighter version, you could use low-fat milk or even almond milk, but the creaminess might lessen.
Heavy Cream: Essential for rich, creamy ice cream. For a lighter option, you can substitute with coconut cream, which adds a slightly different flavor but is still delicious!
Granulated Sugar: This adds sweetness. You can replace it with honey or maple syrup if you prefer a natural sweetener, but be mindful of altering the liquid ratio.
Unsweetened Cocoa Powder: This gives the chocolate flavor. If cocoa isn’t available, use dark chocolate, melted and mixed in, but adjust the sugar as needed since it can be sweet.
Creamy Peanut Butter: A must for that rich peanut taste! You can use crunchy peanut butter for added texture or try almond butter for a different twist.
How Can You Ensure the Perfect Creamy Texture?
The key to a creamy texture lies in cooling and processing your mixture properly. Here’s how to get it just right:
- After cooking, let the mixture cool to room temperature. This ensures that it freezes evenly.
- Make sure to chill it in the fridge for at least 4 hours or overnight; this step cannot be skipped!
- When using the Ninja Creami, if the ice cream comes out crumbly, don’t worry! Just use the “Re-spin” function until it’s smooth. This helps break up any ice crystals that may form.
Remember to enjoy the process and maybe experiment with other additions, like chocolate chips or crushed cookies, to make it even more fun!
Easy Homemade Chocolate Peanut Butter Ice Cream in Ninja Creami
Ingredients You’ll Need:
- 1 1/2 cups whole milk
- 1 1/2 cups heavy cream
- 3/4 cup granulated sugar
- 1/2 cup unsweetened cocoa powder
- 1/2 cup creamy peanut butter (plus extra for drizzling)
- 1 tsp vanilla extract
- Pinch of salt
How Much Time Will You Need?
This delicious chocolate peanut butter ice cream will take about 15 minutes of active preparation time. However, you’ll need to chill the mixture in the fridge for at least 4 hours or overnight and then freeze it for 24 hours. So, make sure to plan a day ahead!
Step-by-Step Instructions:
1. Prepare the Base Mixture:
In a medium saucepan, whisk together the granulated sugar and cocoa powder until well combined. This helps incorporate the cocoa evenly and enhances the chocolate flavor.
2. Add Milk and Cream:
Slowly pour in the whole milk and heavy cream while stirring constantly. Keep mixing until the cocoa and sugar dissolve completely, forming a smooth mixture.
3. Heat the Mixture:
Place the saucepan over medium heat. Warm the mixture until it’s hot (but not boiling), stirring often. This step helps blend the flavors beautifully!
4. Incorporate Peanut Butter and Vanilla:
Once heated, remove the saucepan from the heat. Add in the creamy peanut butter, vanilla extract, and a pinch of salt. Whisk everything together until the peanut butter melts and the mixture is completely smooth.
5. Cool and Chill:
Let the mixture cool to room temperature, then cover it and refrigerate for at least 4 hours or overnight. Chilling is key to getting that perfect ice cream texture!
6. Freeze the Mixture:
After chilling, pour the mixture into the Ninja Creami pint container. Secure the lid tightly and freeze it for 24 hours. This duration allows the ice cream to set properly.
7. Process in the Ninja Creami:
Once frozen, install the pint container into your Ninja Creami machine. Choose the “Ice Cream” function to process the mixture into creamy, delectable ice cream.
8. Achieve the Perfect Texture:
If the texture is crumbly or powdery after processing, don’t fret! Just use the “Re-spin” function one or two times until it becomes smooth and creamy.
9. Serve and Garnish:
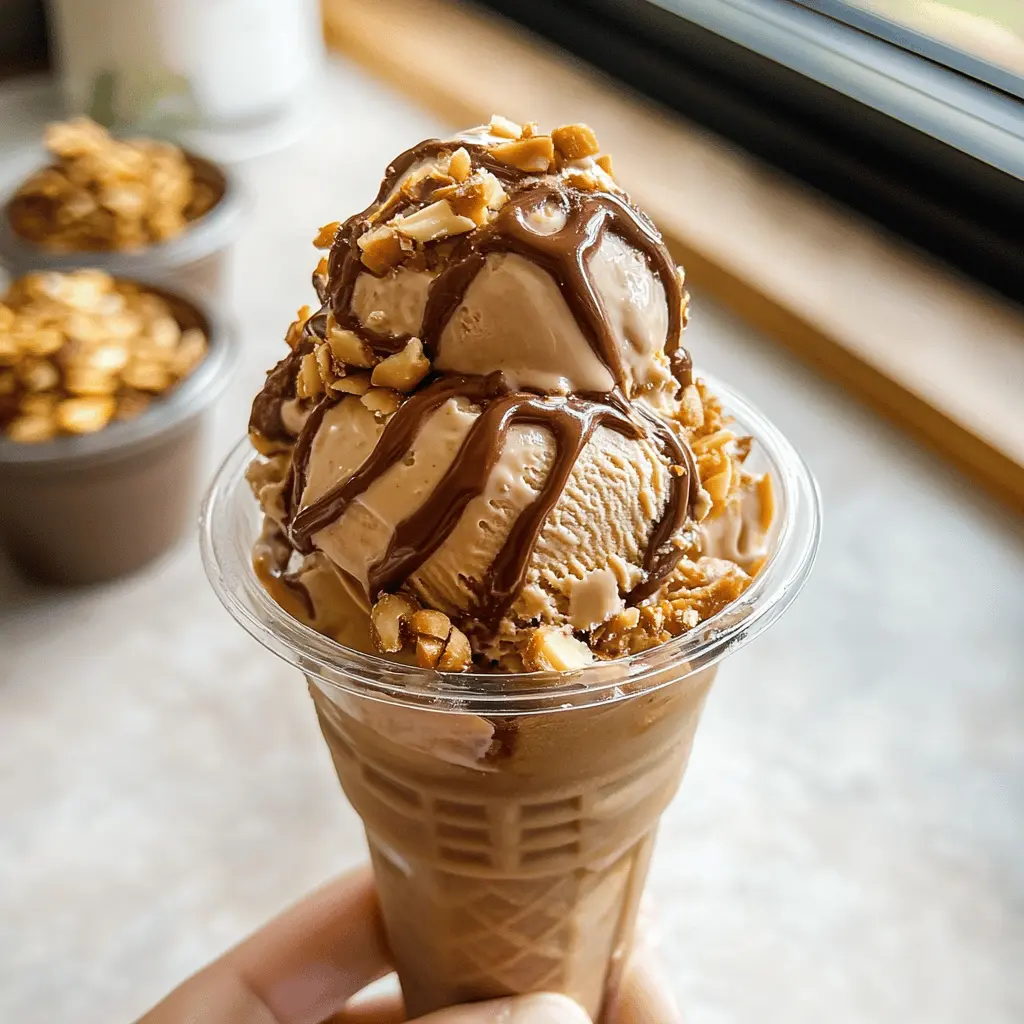
Scoop the ice cream into serving bowls. Drizzle with additional peanut butter if you like for an extra treat!
10. Enjoy!
Serve immediately and dive into your homemade chocolate peanut butter ice cream. Share with friends or keep it all to yourself. Enjoy every delicious bite!
This recipe yields a rich, creamy dessert that’s perfect for chocolate and peanut butter lovers. Happy scooping!
FAQ for Easy Homemade Chocolate Peanut Butter Ice Cream
Can I Use Skim Milk Instead of Whole Milk?
While you can substitute skim milk for whole milk, the texture may be less creamy. For the best results, stick to whole milk or consider using almond milk for a lighter version, but keep in mind it won’t be as rich.
What If I Don’t Have Heavy Cream?
If you don’t have heavy cream, you can use half-and-half as a substitute. However, avoid using just regular milk, as it won’t provide the same creaminess needed for ice cream.
Can I Make It Dairy-Free?
Absolutely! You can substitute whole milk and heavy cream with coconut milk or almond milk, and make sure you use a dairy-free peanut butter. The flavor will vary slightly, but it will still be delicious!
How Should I Store Leftovers?
Store any leftover ice cream in an airtight container in the freezer. It should stay good for about 2-3 weeks. Just remember to let it sit out for a few minutes at room temperature before scooping to soften it up!