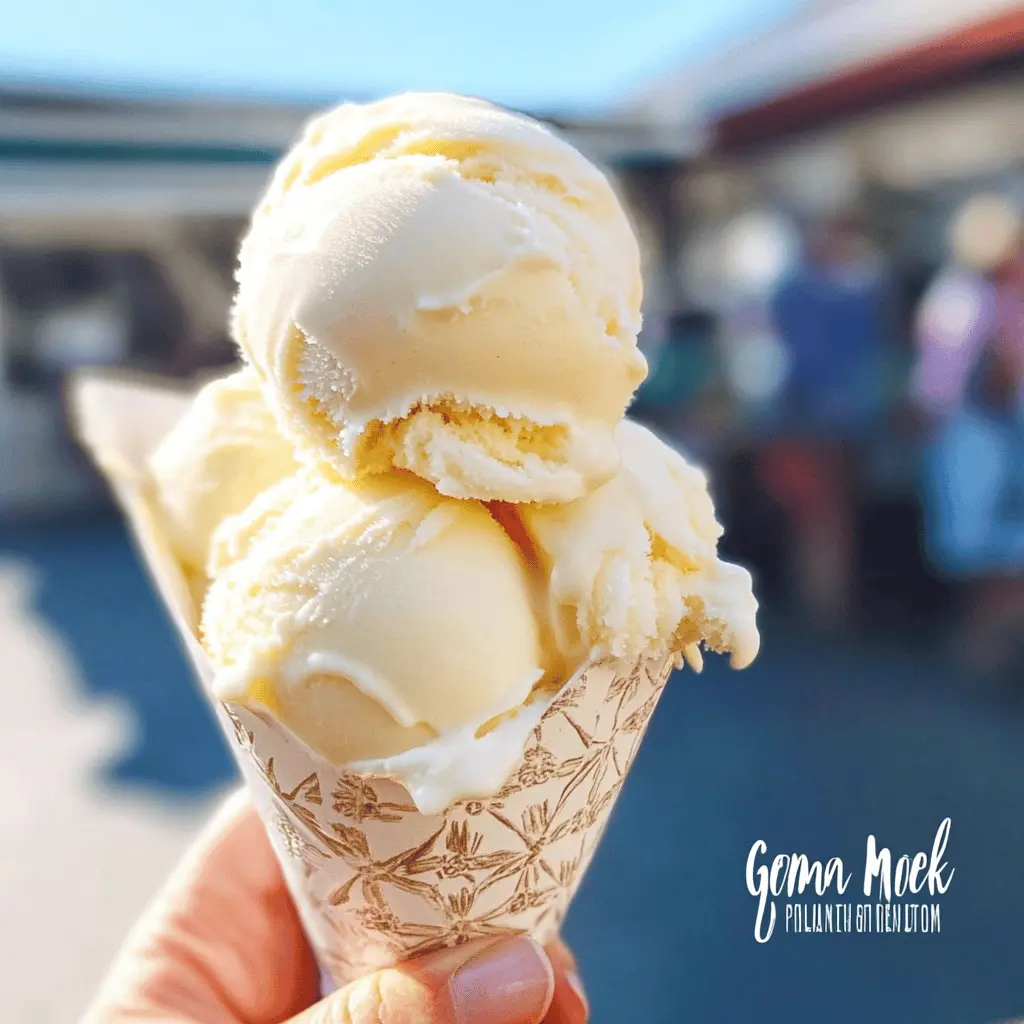
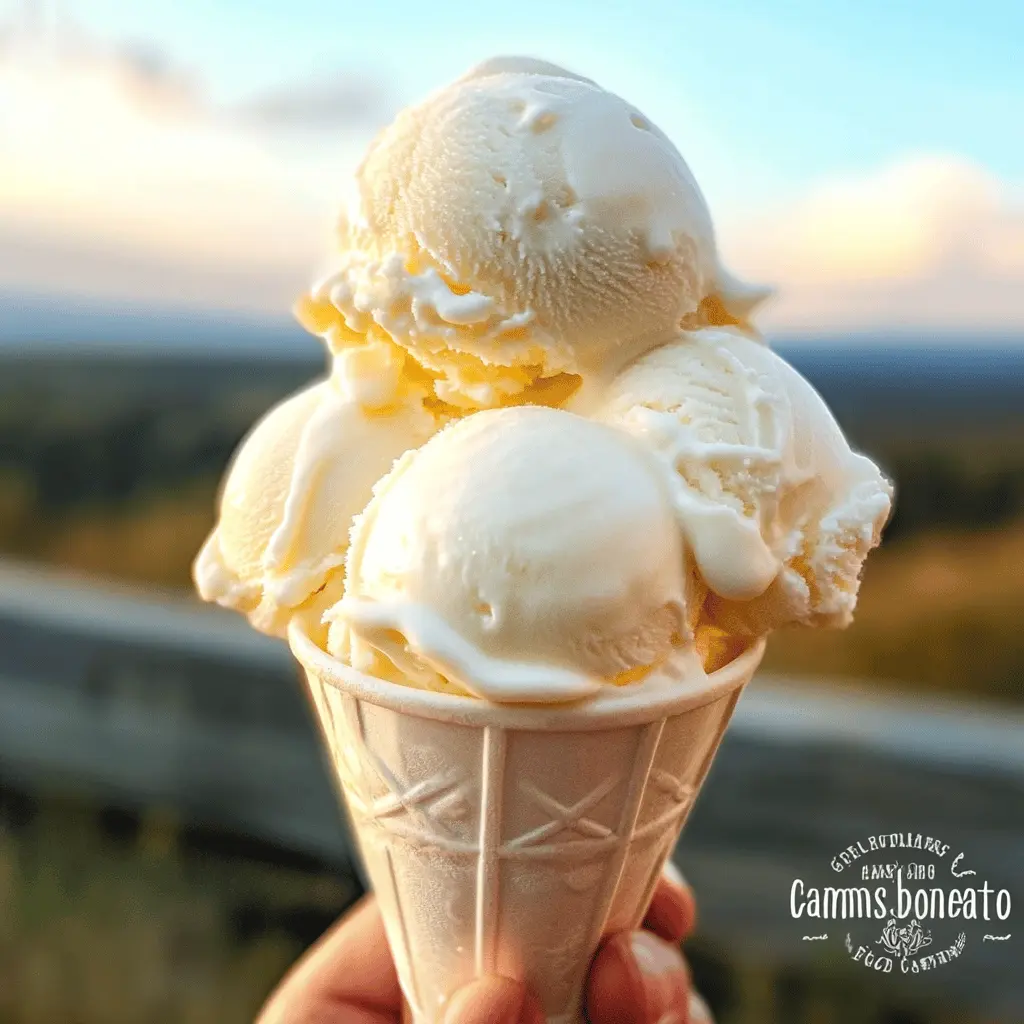
This Easy Grandma’s Homemade Vanilla Ice Cream is a classic treat that’s super creamy and full of rich vanilla flavor. It turns hot days into sweet memories!
When I make this ice cream, the whole house smells amazing! I love serving it with warm pie or just enjoying it straight from the bowl. More is always better, right? 🍦
Key Ingredients & Substitutions
Heavy Cream: This is what gives the ice cream its rich and creamy texture. If you’re looking for a lighter option, you can use half-and-half instead, but the ice cream may be less creamy.
Whole Milk: For a creamier result, you can swap this out for additional heavy cream or use a milk alternative like almond or oat milk. Just be mindful that plant-based milks can change the flavor slightly.
Granulated Sugar: This sweetens the ice cream. If you want to reduce sugar, you can use sugar substitutes like stevia or agave nectar, but this may affect the texture.
Pure Vanilla Extract: This adds that classic vanilla flavor. You can use vanilla bean paste or scrape the seeds from a vanilla bean for a bump in flavor. I always go for pure extract over imitation for the best taste.
Salt: Just a pinch helps to enhance the sweetness and balance the flavors. Don’t skip it—it makes a difference!
How Do I Get Creamy Ice Cream Without Ice Crystals?
The secret to creamy ice cream is in how you churn and freeze it. Here’s how to avoid ice crystals:
- Make sure to churn the mix in your ice cream maker until it reaches a soft-serve consistency. The more air you incorporate, the creamier it will be.
- After churning, transfer the ice cream to a container and smooth the top to remove air pockets. This helps reduce ice crystal formation.
- Cover the ice cream with plastic wrap before adding the lid. This keeps it extra fresh and creamy as it freezes.
- Freeze it for at least 3-4 hours for the best texture. If you can, let it sit at room temperature for a few minutes before scooping for easier serving.
Easy Grandma’s Homemade Vanilla Ice Cream
Ingredients You’ll Need:
- 2 cups heavy cream
- 1 cup whole milk
- 3/4 cup granulated sugar
- 1 tablespoon pure vanilla extract
- A pinch of salt
How Much Time Will You Need?
This delicious homemade vanilla ice cream takes about 15 minutes of prep time plus an additional 3-4 hours to freeze until firm. The actual churning process usually takes around 20-25 minutes, depending on your ice cream maker.
Step-by-Step Instructions:
1. Prepare the Base:
In a mixing bowl, start by combining the granulated sugar and a pinch of salt with the whole milk. Use a whisk to mix everything together until the sugar is completely dissolved. This step is important for a smooth ice cream base.
2. Add Cream and Vanilla:
Once the sugar is dissolved, gently stir in the heavy cream and vanilla extract. Make sure everything is mixed well. This is where the classic vanilla flavor comes from!
3. Churn the Ice Cream:
Pour the creamy mixture into your ice cream maker. Churn according to the manufacturer’s instructions, which typically takes about 20-25 minutes. You’re looking for a soft-serve consistency, so keep an eye on it!
4. Freeze Until Firm:
After churning, transfer the ice cream into a lidded container. Spread it out evenly and cover it tightly. Place the ice cream in the freezer for at least 3-4 hours or until it’s nice and firm. This will give it the perfect scoopable texture!
5. Serve and Enjoy:
When you’re ready to enjoy your homemade ice cream, scoop it into bowls or cones. Delight in the creamy, sweet vanilla flavor, just like Grandma used to make. Perfect for a hot day or any time you need a little treat!
FAQ for Easy Grandma’s Homemade Vanilla Ice Cream
Can I Use Low-Fat Milk or Cream?
While you can use low-fat milk, it may result in a less creamy texture. For the best flavor and consistency, stick to heavy cream and whole milk. If you’re looking for a lighter option, consider using half-and-half for a good balance.
How Do I Store Leftover Ice Cream?
Store any leftover ice cream in an airtight container in the freezer. It can last for about 2-3 weeks. For the best texture, press plastic wrap against the surface of the ice cream before sealing the container to prevent ice crystals from forming.
Can I Add Mix-Ins Like Chocolate Chips or Fruit?
Absolutely! You can add mix-ins like chocolate chips, nuts, or fruit during the last few minutes of churning in the ice cream maker. This ensures they’re evenly distributed without affecting the base texture.
What If I Don’t Have an Ice Cream Maker?
If you don’t have an ice cream maker, you can still make this recipe! Pour the mixture into a shallow dish and freeze it. Stir every 30 minutes for the first 2-3 hours to break up ice crystals until firm, then scoop and serve!